

My RAV4 Camping Conversion Setup For Long Road Trips
FYI: This post definitely contains affiliate links. If you buy anything through these links, then I’ll earn a small commission at no cost to you. See my commission disclosure if you want to know more about it.
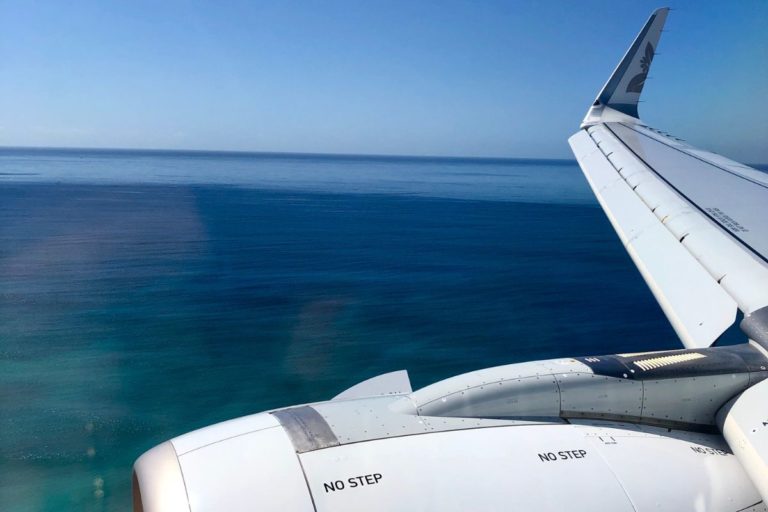
I recently moved back to the US… well, “moved” since I’m currently living in my RAV4 as I travel around the western states to visit friends and family.
Though van life is totally up my alley (I did it in Australia!) I was leaning way more to car camping this time around. Car camping, and especially RAV4 camping, allows extreme flexibility in how you drive, where you go, and what you can do in general. Van life is fun but it really locks you into it in ways that I wanted to avoid this time.
So car camping it is!
I just began my car camping adventures and will likely be adjusting my Toyota RAV4 camping setup as I go. For now, here is exactly what I did to convert my small SUV into a camper and all the camping gear that goes with it.
The steps I took to convert my 2022 Toyota RAV4 into a camper
I purchased everything in my Toyota RAV4 because honestly I didn’t want to spend the time building it out myself. I also didn’t want to really convert my car into a camper… I wanted the option to remove everything easily once I stop my car camping adventures.
I’ll go through what I did to prepare my RAV4 for road tripping around the mountains and I’ll also share a few alternative methods for each step in case you want something a little more DIY.
1. Fold down the back seats
First things first, you’re going to need more room than what a standard Toyota RAV4 offers. The easiest way to do that without taking your car apart is by folding the rear seats. With the back seats folded, you can use the entire space for your sleeping platform and as additional storage space.
If I were doing this longer term, then I might remove the rear seats altogether to give myself as much storage room as possible. You could even remove the spare tire if you’re packing lots! It’s a bit tight at the moment and I ditched a lot of multi-season clothing that honestly would have been real handy to have right about now (as I huddle in the tent while it rains outside).
2. Install storage system
I personally got an epic kitchen drawer set by Nomad Kitchen Co. and that stores a lot of my kitchen stuff. It also leaves room on the sides for even more storage space, where I keep food and kitchen items to the left and random odds and ends on the right (like toilet paper and shovel, firewood, and other things I can’t remember anymore).

The back seats and wheel wells take up quite a bit of room, so the only other place I have for storage is underneath the sleeping platform. This is where I keep my Starlink kit, backpacking gear tucked behind the front passenger seat, and all other camping gear like my chairs and tents and whatnot. I also slide my folding KingCamp table and slide it underneath the sleeping platform from the rear door so that it sits flat on top of the kitchen unit.
If you want more grilling options, then take a look at my recommended RV grills.
3. Set up your sleeping platform
I bought a simple single person adjustable cot from REI, but really any sleeping platform will work. You could build a bed platform pretty easily with some 2×4’s and plywood from your local hardware store. It might be cheaper that way too.
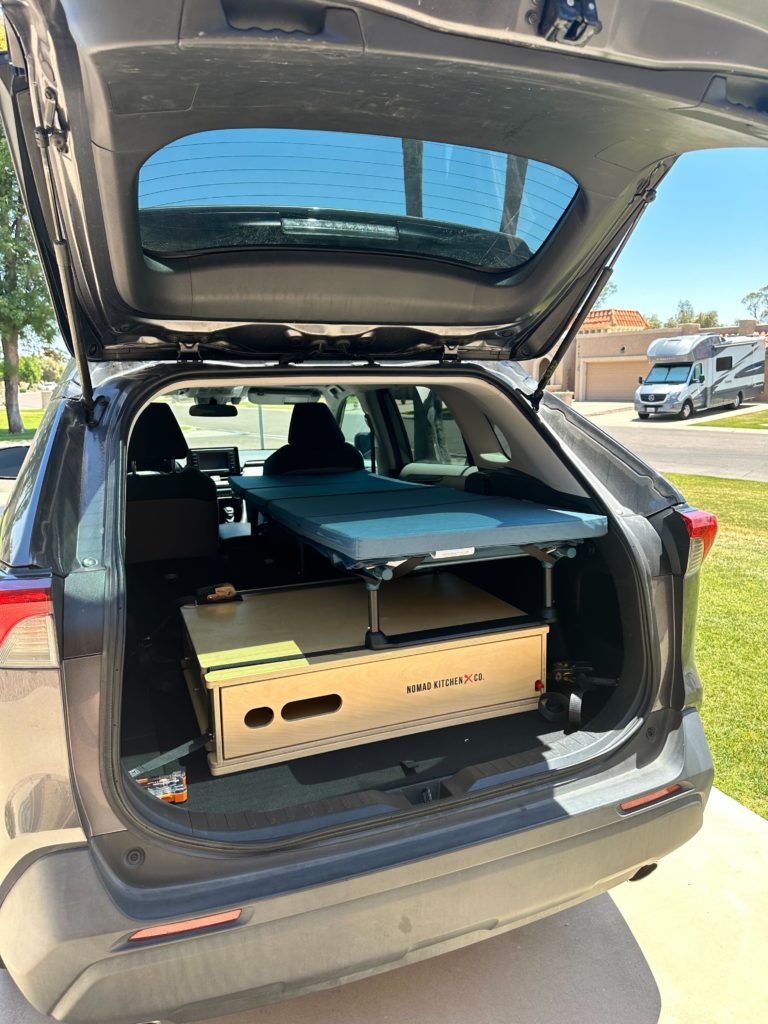
I like the cot for my RAV4 camping setup because I can fold it up and store it easily for when I’m not car camping. It has two sets of shorter legs, which sit atop the kitchen and folded back seats. There are two longer legs that reach the floor behind the front passenger seat.
The entire platform will reach from the rear windows to the front seats on the passenger side and should be completely flat. The cot that I’m using has adjustable legs so that they can reach the “ground” at three different levels: atop the kitchen unit, over the folded seats, and behind the front passenger seat.
NOTE: I actually had to put a few wood blocks under the center legs of the bed platform because the kitchen unit raised it too much for the middle legs to reach the “ground” anymore.
For reference, I’m traveling by myself and I’m 5’11”. If you’re over 6′ then this configuration might be a bit tight, but you can always put the front seat pushed forward so allow enough room for your body to stretch out. Alternatively, you can flip yourself so that your feet are straddling the front passenger seat and your head is toward the back door.
You can pop a memory foam mattress on top of this bed platform or do like I did and just blow up my sleeping pad that I take camping. I topped this with some soft jersey sheets and this cool Rumpl blanket that packs up nicely. I’ve got my sleeping bag in case it gets cold but since I’m doing this during the summer, I think the temperatures will be alright.
UPDATE: I have since upgraded to a HEST Foamy mattress pad. One month in and I couldn’t take it anymore! It is one of my better investments.
4. Cut out your privacy window coverings
The simplest way to get perfect window coverings is to make them yourself from a roll of Reflectix BP48010 Double Pack Insulation, (48 in. x 10 ft). I used large stock paper to create templates of each window and then cut out the Reflectix from the templates. It was pretty easy to do and seemed a better option then finding a bunch of window screens that maybe would fit your car windows.
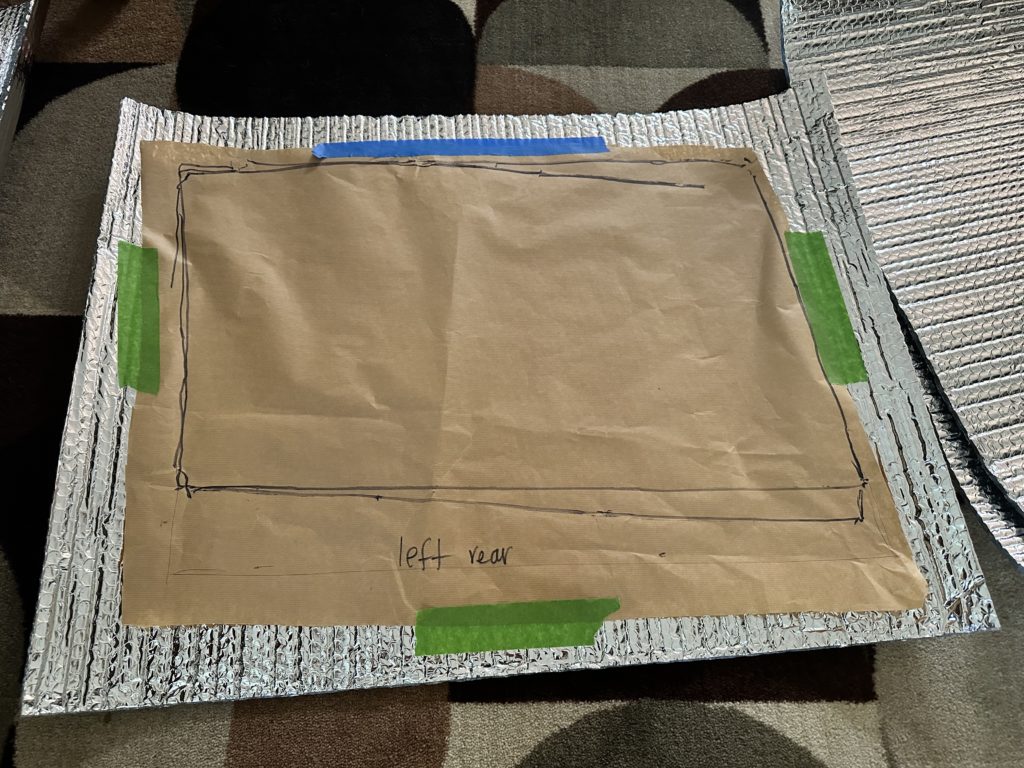

This insulation will both provide privacy and also insulation for cooler nights. This makes it easier to fall asleep when you’re car camping in places where it’s a bit more crowded 🙂
5. Get mosquito nets for car windows
I got these nifty mosquito nets designed for car windows. I only got two for the back windows and only crack the windows a little bit to let fresh air in. You can roll the windows all the way down if you’d like! It’s nice to be able to hear the sounds of nature around you at night while you sleep when the windows are cracked 🙂
6. Get your power source set up
As a digital nomad, I use a lot of devices. I opted for the Jackery Explorer 1000 to power all of my devices, including my Starlink. I got two solar panels with it and I’m glad I did because I still don’t think this is a comfortable amount of power without them!
The Starlink uses about 50-60 watts and the solar panels can easily put in 100-120 watts… if the sun is shining brightly. Currently, I’m getting about 8 watts with the thunder clouds outside, yet I’m using my Starlink and charging my computer at the same time, using almost 100 watts.
With a Jackery 2000, you could easily avoid running it completely flat, which I think is worth the peace of mind if you can swing the price tag.
I also have my little cooler plugged into it which sucks up even more watts… so I opt to have it unplugged when the outside temperatures drop enough to maintain a cooler temperature naturally. Otherwise, I would have drained the battery by now with these thunder clouds covering up all the sunshine.
I recommend charging everything in a wall outlet at home before heading out on the road.
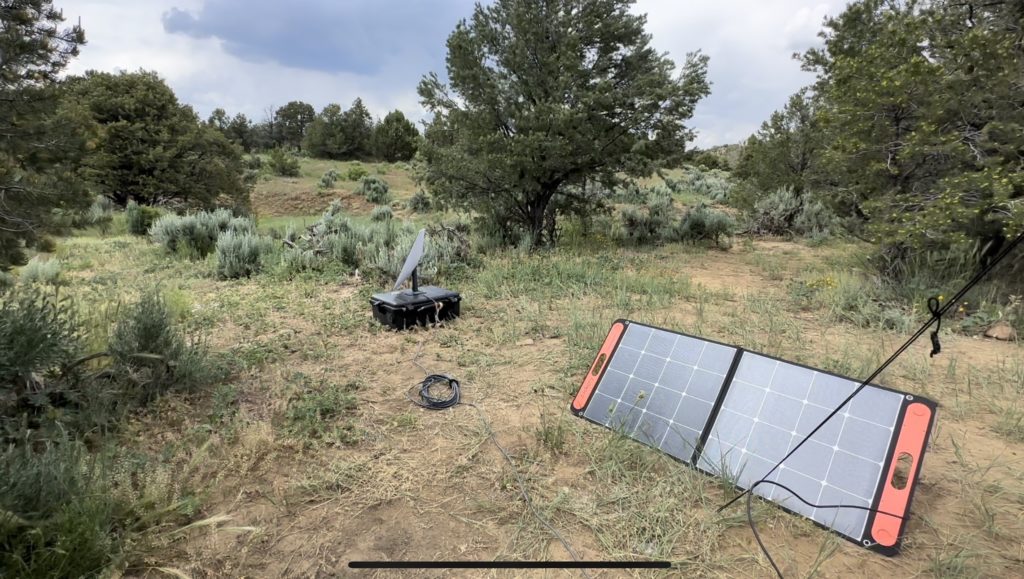
7. Sort your data and internet
I plan on doing lots of road trips in really remote areas, so it was important to me that I had internet service no matter where I went. While I do intend to play outside, a girl’s gotta eat and so I gotta work 🙂
Starlink has been impressive and reliable. Though the customer experience was an absolute drag when ordering (the website is soooooooo glitchy and customer support is nonexistent), I’m really happy to be using it now. It’s pretty pricey per month, but you can pause the service when you’re not using it.
It’s really easy to set up and get connected. I even use it when visiting friends because it’s better than their standard WiFi!
I got an epic case from Savage UTV to protect it and store it. It also serves as a sturdy base that can withstand strong winds and rain. It is all very big and very heavy, so that’s a little difficult when working with limited space. But the fact that I’m chilling in my tent while writing this blog post makes it all worth it.
The other thing I got was a WeBoost Drive Reach. It’s what truckers use to get service on long stretches where service is limited. I’ve found that it’s not sufficient for working, but it’s handy while driving so that I can always be connected. It is especially appreciated when I’m chasing dispersed campsites that aren’t accurately marked on Maps!
See my full breakdown on how to get WiFi while camping for more ways to stay connected.
8. Plan for storms and bad weather
I originally used to have an awning and rooftop tent, which I LOVED for camping. The awning provided shade and cover in light rain.
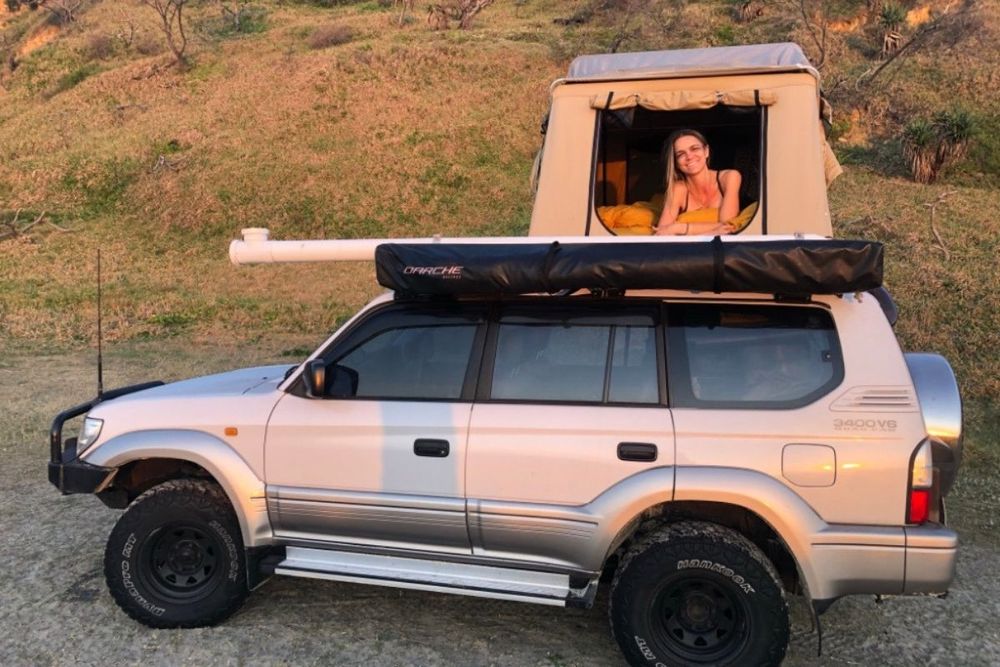
Because of this, I got the Thule Overcast awning this time around for days I just want a little shade without setting up camp.
However, the first time I took Toyota RAV4 camping was with my mom in Arizona right when a massive thunderstorm hit. I hadn’t expected it and we really didn’t know what to do with ourselves. In fact, I’m glad it happened because I’ve already encountered a lot of storms on this road trip!
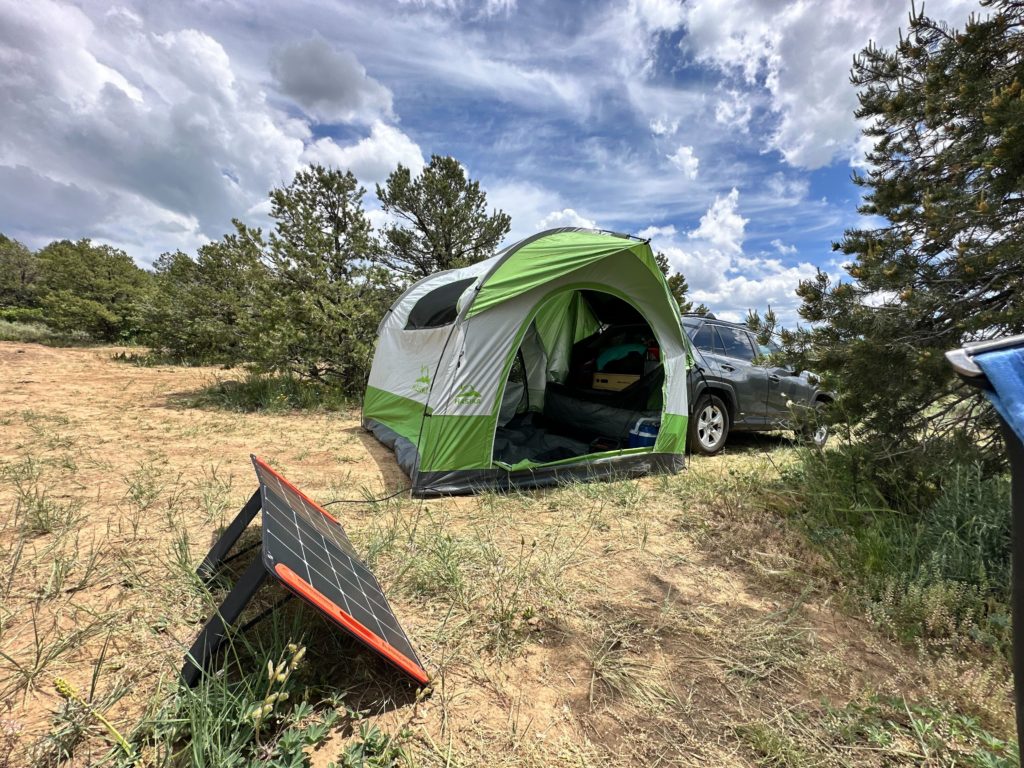
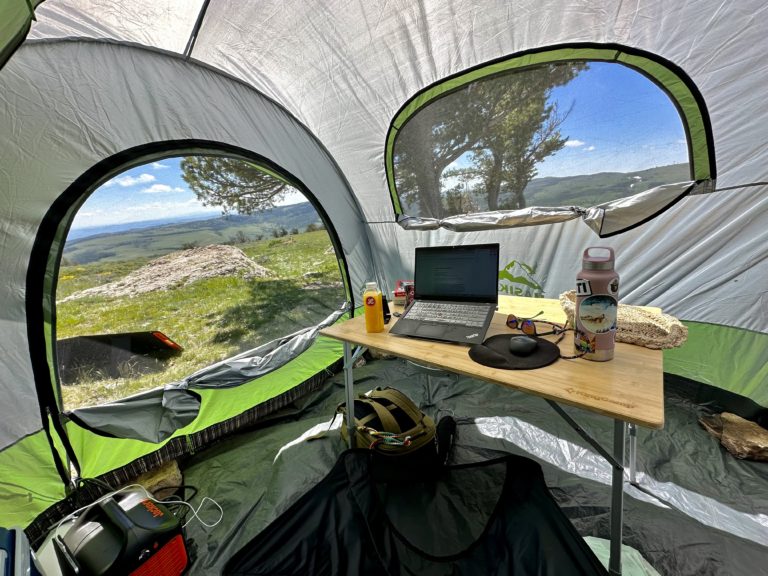
Because of that initial experience, I purchased a Hasika SUV Tent that connects to the back door. This makes it easy to use the kitchen and crawl into bed without having to go out into the rain. It’s also been really handy in the intense sun when there isn’t much shade around.
You can get any kind of SUV tent. The Hasika SUV Tent is sufficient and easy enough to set up by myself, though I struggled a bit to begin with 🙂 Luckily, I’m tall.
Just a warning, strong winds will definitely create some gaps between your car and the car tent. You might get a bit of drizzle coming in too. In fact, one of the straps that is meant to secure the tent to the back tire ripped right off of the tent, rendering it useless. Luckily, I have a sewing kit!
I like the SUV tent and awning combo because it gives me the most flexibility for the least amount of space.
8. Get your camping gear setup
I got this foldable KingCamp table, a stargazing chair, a hammock, and a few other lightweight seating options for me to chill at the campsite.
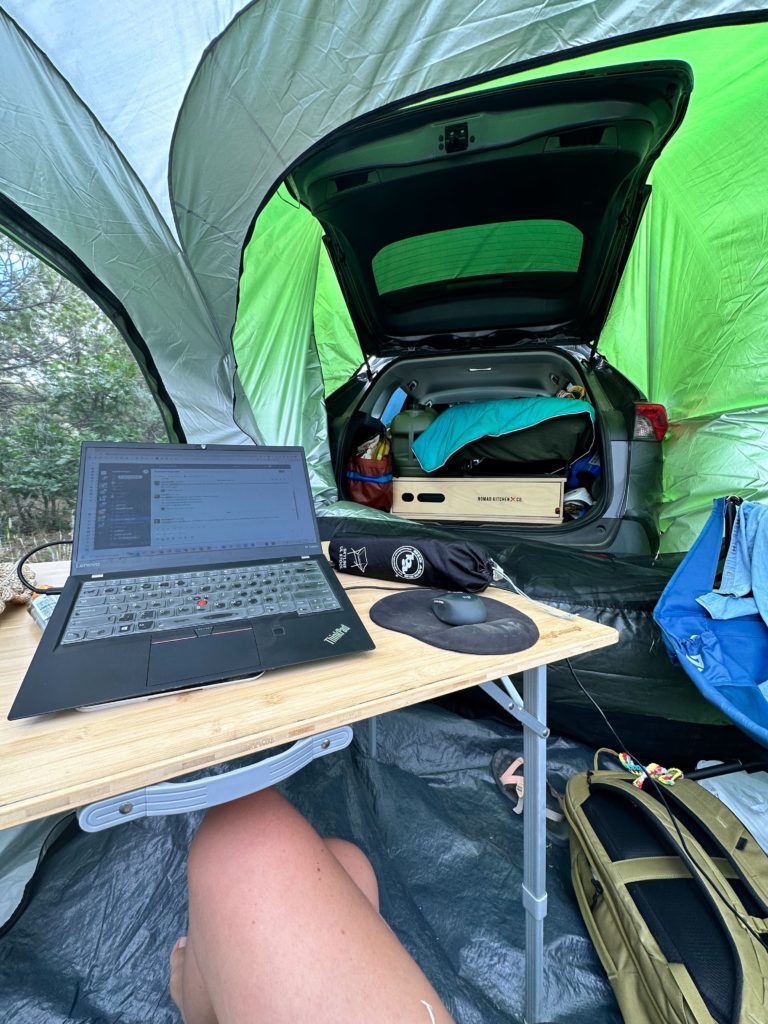
This has also made the perfect workspace for me and also a place to just generally enjoy my surroundings.
I also have my car awning for shade when the weather is good.
9. Grab things that will make your life easier
Lots of other stuff in my car is really all about my own comfort, which I think is important when you’re living out of a small space. These small adjustments will go a long way.
- Large water container that’s easy to pour. Water storage is apparently not as simple as I though. The 8 gallon jug I got comes with a pour spout: USE IT. I packed mine away and am not sure where it’s at, so I’m trying to pour straight from the opening and I’ve filled my tent with more water than the rainstorm itself.
- Bathroom necessities. I got a foldable shovel and RV toilet paper so that it is biodegradable… but remember, pack it in and pack it out! My mom got me a little portable toilet seat for me to use as well, but I didn’t bring it because I just didn’t want to take up space in my car.
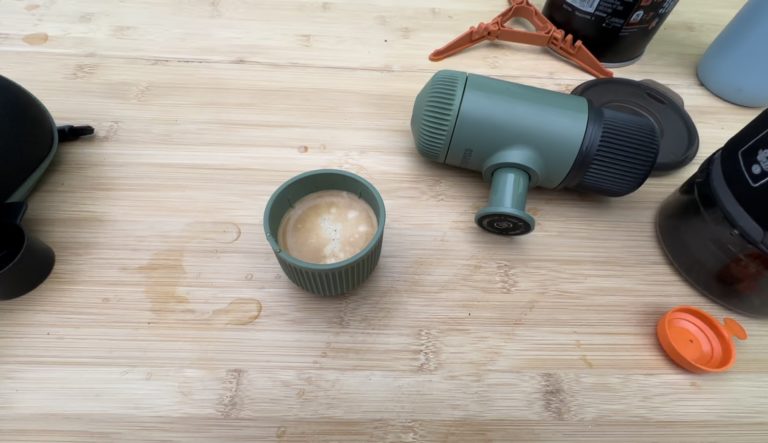
- Food storage and prep. I got a big tote bag to hold all of my food items and miscellaneous kitchen stuff, like my Ninja blender, travel kettle, and Nanopresso. The bag is coming in real handy because it can hold quite a bit and is flexible enough to be squished into the space to the left of the kitchen unit easily.
- Comfortable bedding. Nothing feels as good as a comfy bed and the fact that you’re sleeping in a car means that it’s just slightly less comfortable. I spruced mine up with an inflatable sleeping pad, jersey cotton sheets (twin mattress size), and a damn good pillow. We will see how that pillow goes with height clearance tonight 😉
- Clothing storage and organization. I definitely underpacked in this area… I’m pretty cold right now because I didn’t bring winter gear because June iS nOt WiNtEr (that’s my immature voice). At any rate, I packed one carry-on suitcase with all of my clothing and one large backpack for all of my electronics. These can easily stack to the side of the driver’s side back seat, leaving plenty of room to get in and out of there.
- Mini fan. I got this cute little fan that I can clamp onto anything, which is really handy when nights get stuffy… or when the SUV tent gets stuffy in the sun!
Tips for easier car camping
Here are a few more things I learned after taking a few road trips in this bad boy.
Download offline maps
I have lost my maps on a few trips simply because I stopped to take in a view and disconnected from the map to do so. It’s so frustrating! An easy way to avoid this is to download offline maps.
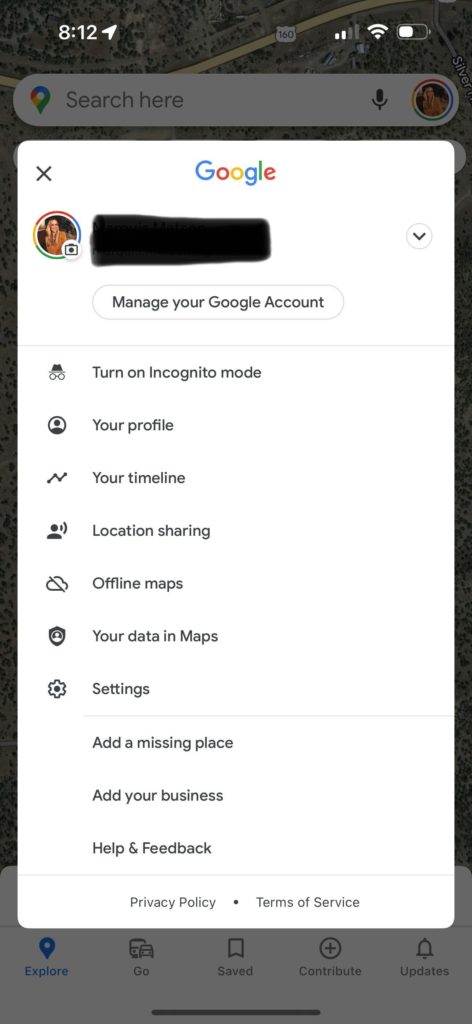
When you’re in Google Maps, tap your profile picture on the right-hand side. When the menu comes up, tap “Offline maps”. This will allow you to select an area to download and voila!
Watch the grade when parking
We generally sleep on flat surfaces and that’s a really good thing: blood doesn’t pool on either end of your body. Before you set up your vehicle at your campsite, check for a flat surface. The back end of the Toyota RAV4 is slightly lower than the front end so you could opt to elevate the back end to compensate for this.
I really like these levelers to help get a flat surface for sleeping and cooking out of my car.
Test things out before hitting the road
Take your car out on a few trips before hitting the road to work out the kinks ahead of time. I really only had one opportunity to test things out and it’s what inspired me to get the SUV tent… which has been absolutely crucial so far.
Closing thoughts
If I had to prioritize where I spent my money, it would be
- Jackery & Starlink (most money)
- HEST Foamy mattress pad
- SUV tent
- Kitchen unit (a little pricey but makes it easy for a non-build conversion!)
- Cool camping gear for hanging out
- Sleeping platform (doesn’t have to be expensive, can be handmade from basic supplies at most hardware stores)
Have any suggestions or questions? Drop them in the comments!
8 Comments