
Yoga For Travel: A sequence for tight hips, shoulders, and neck
If you’re like me, living the nomadic life out of your car, you know how important it is to stay active and flexible. Between long drives and remote work, our bodies can take quite a beating.
That’s why I’ve put together this travel yoga sequence that I personally use to keep my body strong, flexible, and pain-free. It’s a mix of backbends, hip stretches, and core exercises that you can do anywhere – at a campsite, by a lake, or even in a parking lot.
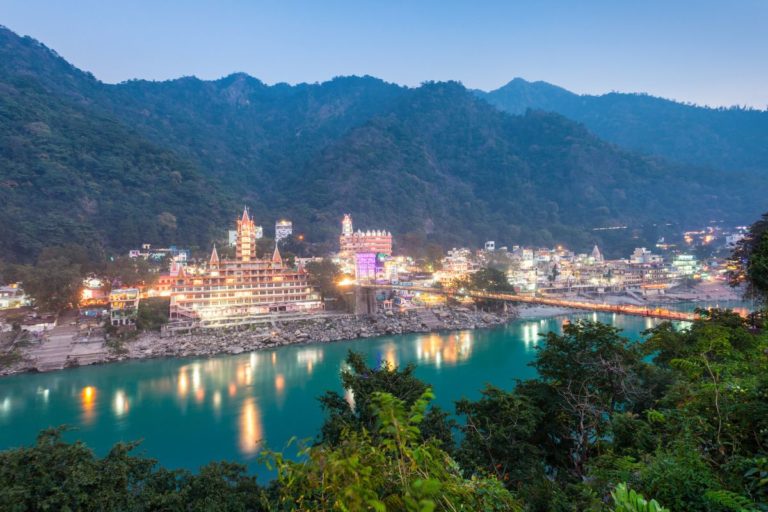
I became a certified yoga teacher in India a few years ago in Hatha Tantra Yoga. While I don’t practice Hatha Tantra exclusively, I do pull a lot of the same principles from this yoga lineage in my daily practice.
So enjoy this yoga for travel sequence. It builds heat, strengthens the core, and keeps your body flexible!
I’ll see you on the mat!
Downward Facing Dog – Adho Mukha Svanasana
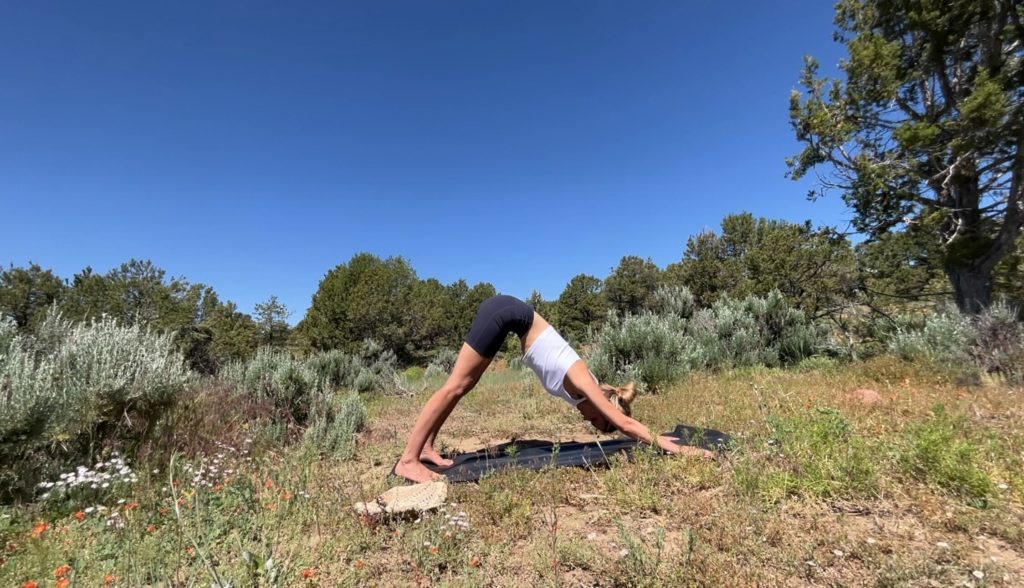
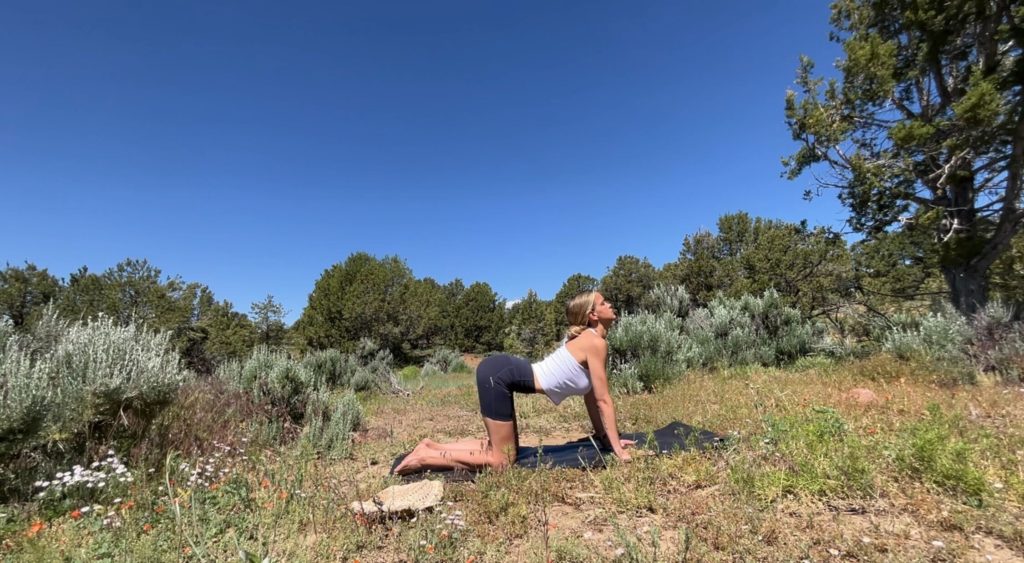
Downward Facing Dog is a great posture for travelers because it stretches the entire back side of your body – from your heels to your hips to your shoulders. It’s especially beneficial for those long hours behind the wheel or in front of a laptop, as it helps to relieve stiffness in the shoulders and hips.
Breathe deeply in this posture and remain engaged. While downward dog is a great passive posture in between an intent flow, it is quite powerful as an active posture. I like to use it to really engage my entire backside as well as my core, which I use to pull my body closer to my kneed.
However, if you have severe carpal tunnel syndrome or high blood pressure, you might want to avoid this pose or modify it with props. Always listen to your body and don’t push into pain.
Steps to get into Downward Facing Dog:
- Start on your hands and knees. Align your wrists directly under your shoulders and your knees directly under your hips.
- Tuck your toes under and lift your hips, straightening your legs as much as possible.
- Press your palms into the ground and rotate your inner elbows towards each other and pull your upper arms away from each other.
- Pull your shoulder blades down your back toward your hips, creating space between your shoulders and ears.
- Relax your head between your arms, but don’t let it dangle.
Plank Pose – Kumbhakasana
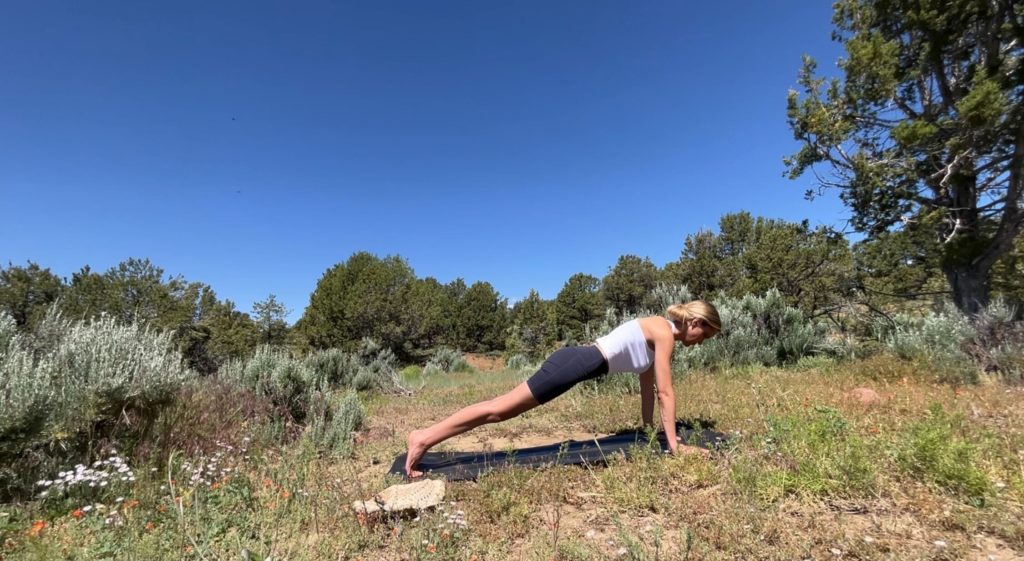
Plank Pose is a fantastic core strengthener. It’s perfect for travelers because a strong core helps with overall stability and balance, which is essential for any outdoor activities like hiking or rock climbing. It’s also really helpful in supporting the spine in general, which can alleviate a lot of soreness in the neck and shoulders.
Be cautious if you have lower back or shoulder injuries. Make sure to keep your body in one straight line and avoid dropping your hips or lifting your buttocks too high.
Steps to get into Plank Pose:
- Start in Downward Facing Dog.
- Shift your weight forward until your shoulders are directly over your wrists.
- Keep your body in one straight line from the top of your head to your heels.
- Engage your core and hold.
Thread The Needle – Urdhva Mukha Pasasana
Thread The Needle is a wonderful pose for releasing tension in the shoulders and upper back. It’s a great stretch and counterpose for the hunched position we often find ourselves in while driving or working on a laptop.
I also really love this after a long flight 🤤
Avoid this pose if you have serious shoulder injuries. Always ensure you keep your neck in a neutral position during yoga poses, aligned with the rest of your spine.
Steps to get into Thread The Needle:
- Start on your hands and knees in a tabletop position.
- Slide your right hand between your left hand and left knee, right palm facing up.
- Rest your right shoulder and the right side of your head on the mat.
- Extend your left arm towards the ceiling or rest it on your lower back.
- Repeat on the other side, left palm facing up.
Cat Cow (With Extensions) – Marjaryasana/Bitilasana

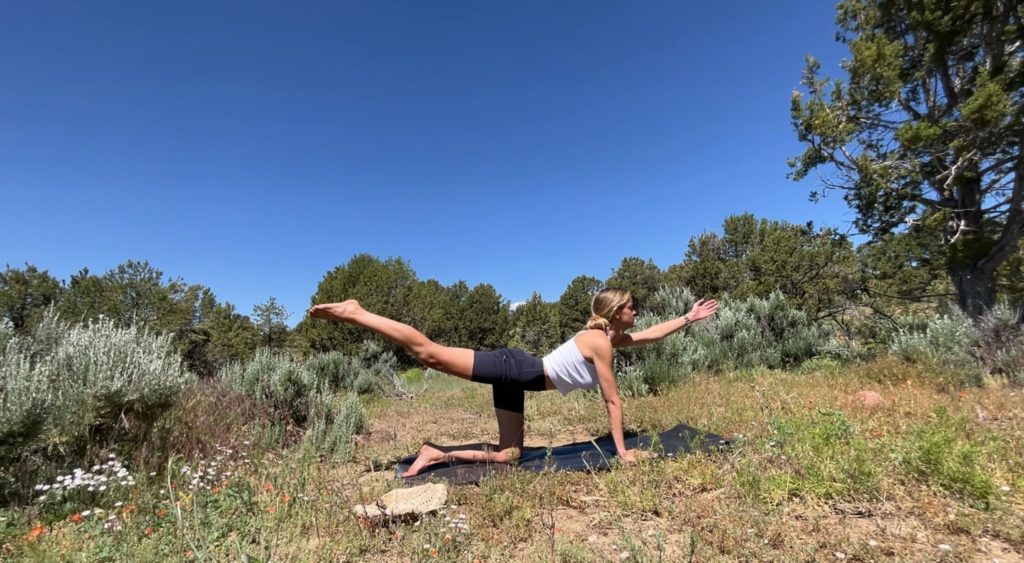
Cat Cow, especially with extensions, is a gentle sequence that warms up the spine and prepares the body for more challenging postures. It’s perfect for travelers as it helps to relieve back pain and stiffness after long periods of sitting. I also really like this dynamic posture for my hip flexors as it actively engages my hips in a wide range of motion.
To make this a core workout, add in these extensions as you breathe in and out. Breathe in as you expand, breathe out as you contract.
Avoid these movements if you have a neck injury. Always move with your breath and keep the movements smooth and fluid.
Steps to get into Cat Cow with Extensions:
- Start on your hands and knees in a tabletop position.
- Inhale, drop your belly, and lift your chest and tailbone towards the ceiling (Cow Pose).
- Exhale, round your spine, tuck your tailbone, and draw your chin towards your chest (Cat Pose).
- For extensions, inhale and extend your right arm forward and left leg back.
- Exhale, round your spine and draw your elbow and knee towards each other.
- Repeat on the other side.
- Do a few rounds of this for a core workout.
Child’s Pose – Balasana
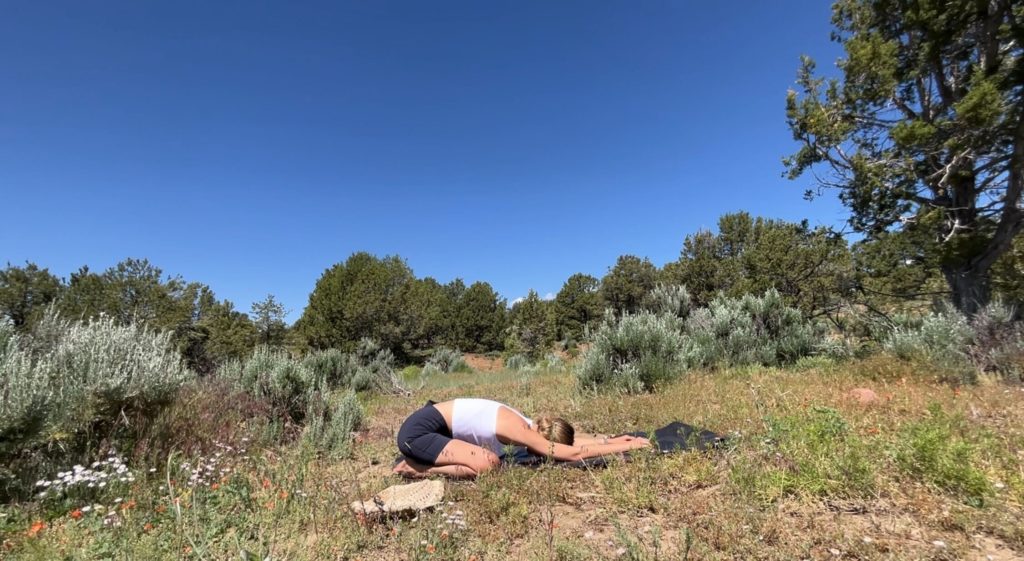
Child’s Pose is a restorative posture that gently stretches the hips, thighs, and ankles. It’s a great pose for travelers as it helps to calm the mind and relieve tension in the body, making it perfect for unwinding after a long day of adventures.
I especially like it for my lower back after driving all day.
Avoid this pose if you have knee injuries or if you’re in the third trimester of pregnancy. Always ensure your knees are comfortable, and use a blanket or yoga mat for support if needed.
Steps to get into Child’s Pose:
- Start on your hands and knees in a tabletop position.
- Spread your knees wide apart while keeping your big toes touching.
- Exhale and rest your buttocks on your heels.
- Lay your torso down between your thighs and rest your forehead on the mat.
- Extend your arms in front of you with palms facing down.
Three Legged Down Dog (With Knee To Forehead) – Eka Pada Adho Mukha Svanasana (with Janu Shirasana variation)
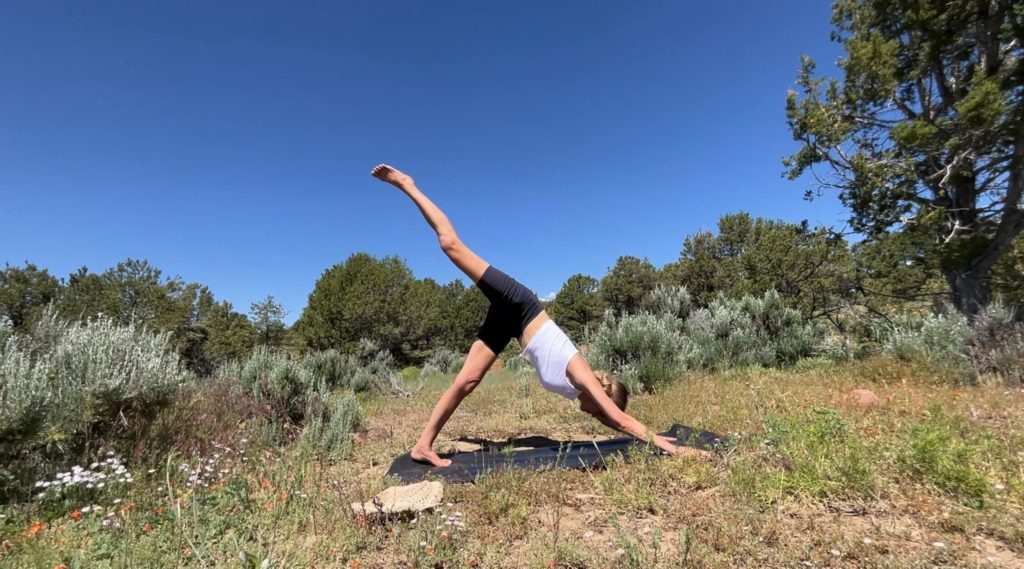
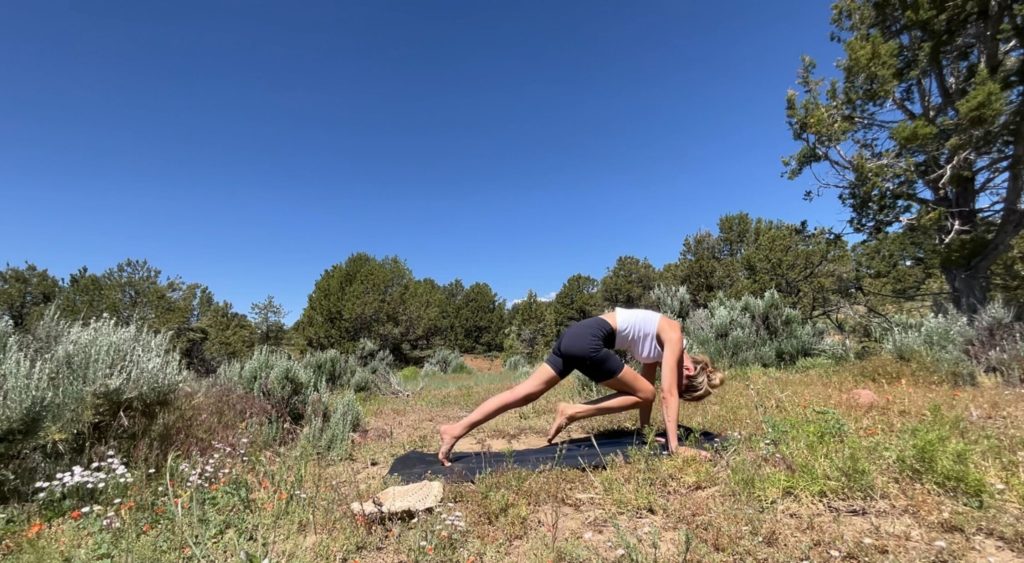
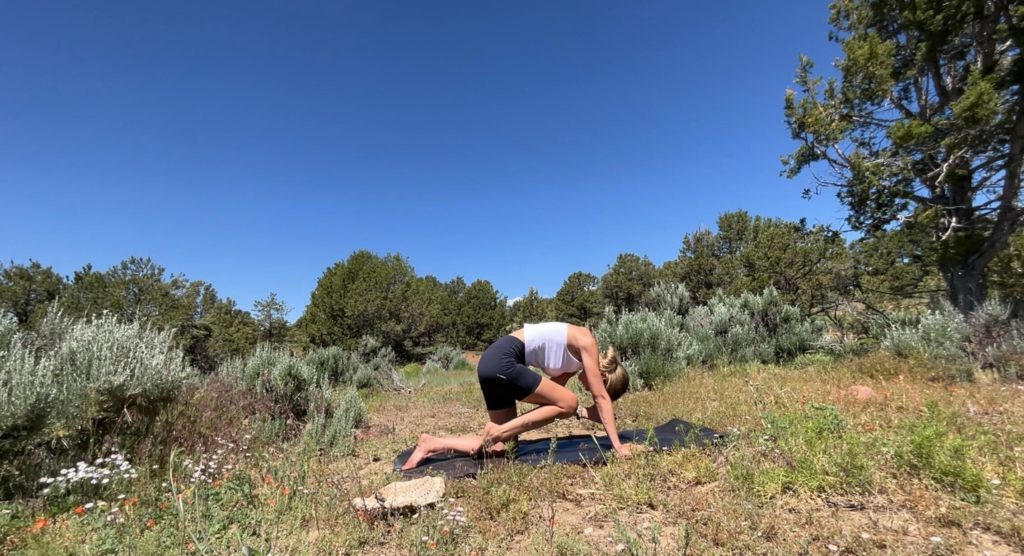
This variation of Downward Facing Dog strengthens the core and improves balance. It’s also beneficial for travelers as it stretches the hamstrings, which can tighten during long periods of sitting.
Avoid this pose if you have high blood pressure or severe carpal tunnel syndrome. Always ensure your standing leg is firmly grounded and your hips are square.
Steps to get into Three Legged Down Dog with Knee to Forehead:
- Start in Downward Facing Dog.
- Lift your right leg up towards the ceiling.
- Exhale and draw your right knee towards your forehead while rounding your spine.
- Inhale and extend your right leg back up.
- Repeat on the other side.
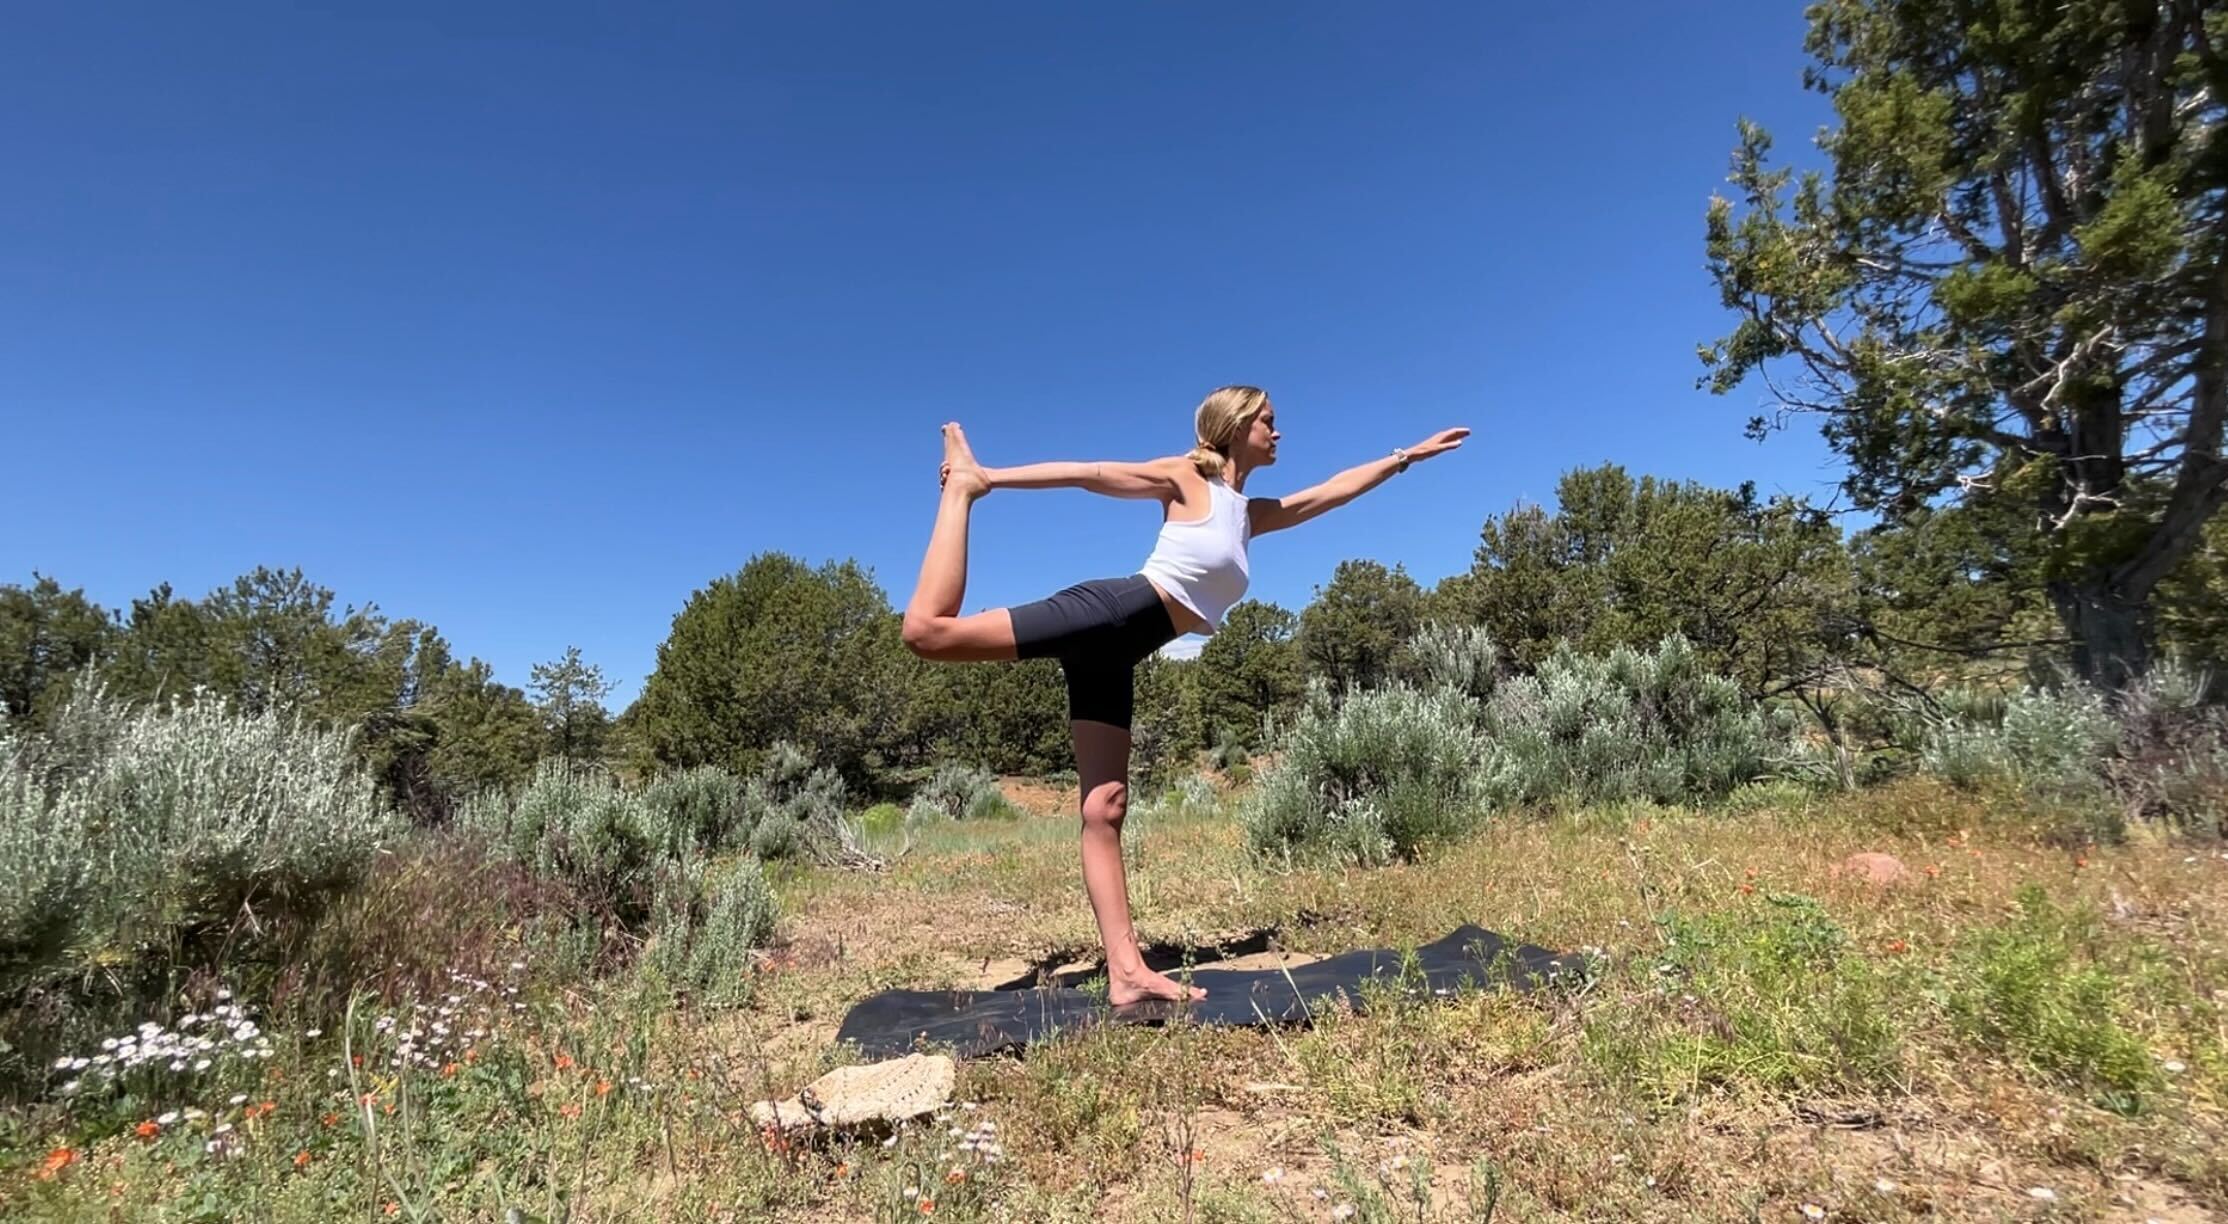
Dancer’s Pose – Natarajasana
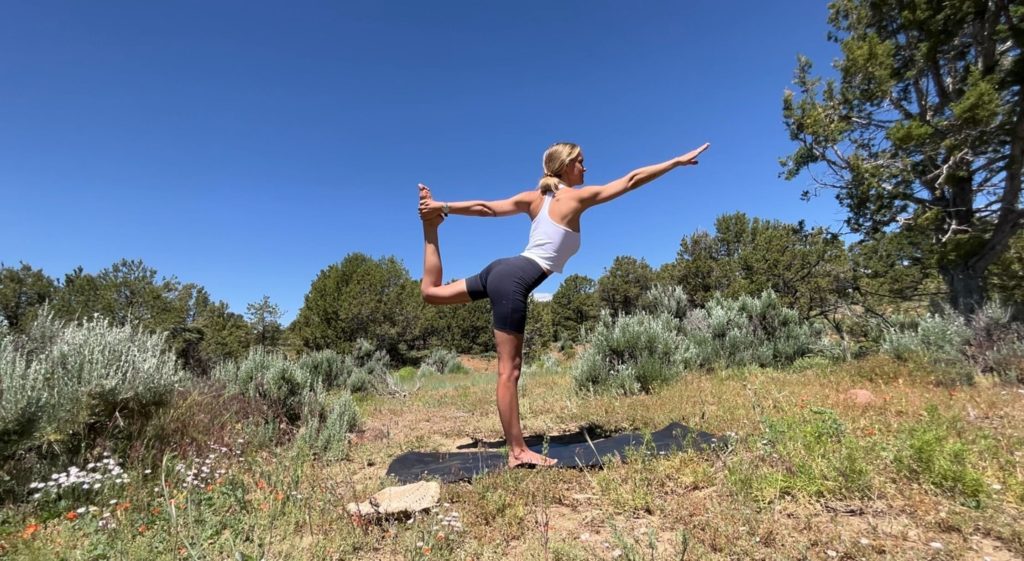

Dancer’s Pose is a beautiful balance pose that strengthens the legs and stretches the shoulders and chest. It’s perfect for travelers as it improves posture and balance, which is beneficial for any outdoor activities.
It’s not a beginner-friendly posture but you can carefully give it a try. Try to look like I do in the picture instead of how you see on Instagram… that’s how you get injured. Instead, focus on opening and lifting your chest and lift your foot as well.
Avoid this pose if you have serious ankle or low back injuries. Always ensure you’re grounding through your standing foot and not straining your neck.
Steps to get into Dancer’s Pose:
- Stand tall with your feet hip-width apart.
- Shift your weight onto your right foot.
- Bend your left knee and catch your left foot with your left hand.
- Extend your right arm forward and lift your left foot up as you lean your torso forward.
- Push your foot into your hand, lifting both your foot and your chest upward.
- Hold and then switch sides and repeat.
Camel Pose – Ustrasana
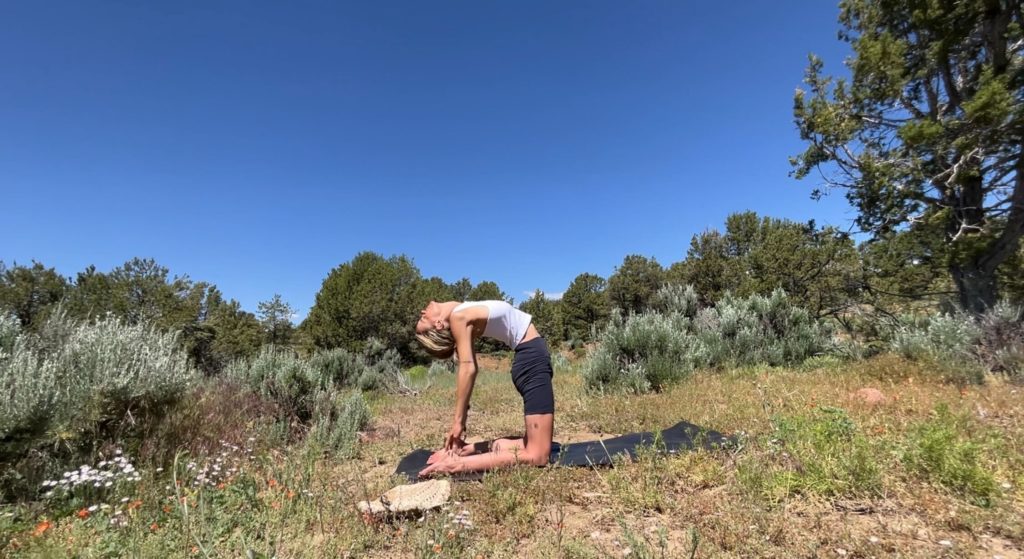
Camel Pose is a deep backbend that stretches the entire front of the body and improves spinal flexibility. It’s great for travelers as it counteracts the hunched posture from driving or sitting at a desk.
If you can’t reach your heels, that’s okay. Put your hands on your lower back instead. If it hurts to drop your neck back like I do, then don’t! Make sure you are comfortable.
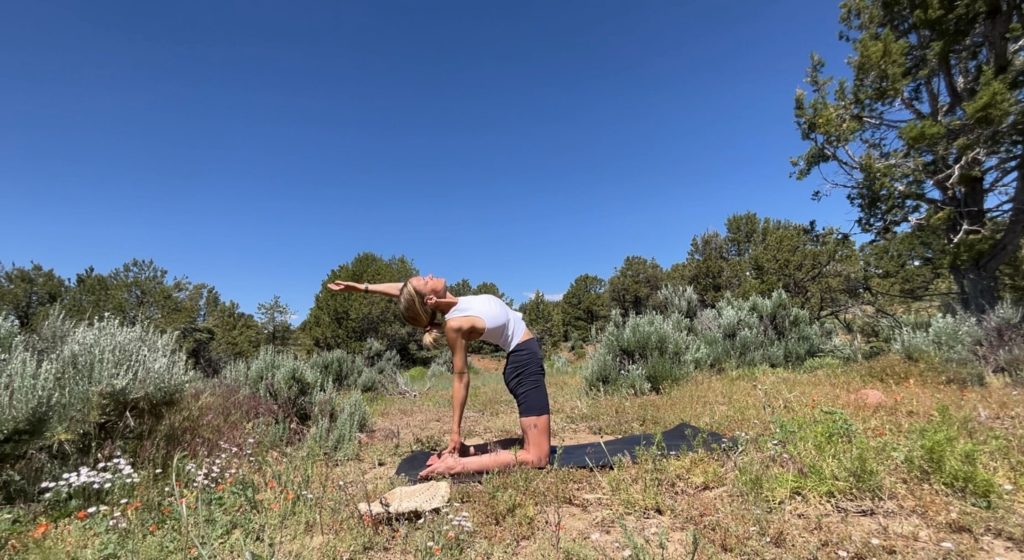
Avoid this pose if you have neck or low back injuries. Always ensure you’re lifting through your chest and not straining your neck.
Steps to get into Camel Pose:
- Kneel on the mat with your knees hip-width apart.
- Place your hands on your lower back with fingers pointing down.
- Lift your chest up towards the ceiling as you lean back, keeping your thighs vertical.
- If comfortable, reach back and hold onto your heels.
- Lift through your chest and keep your neck neutral.
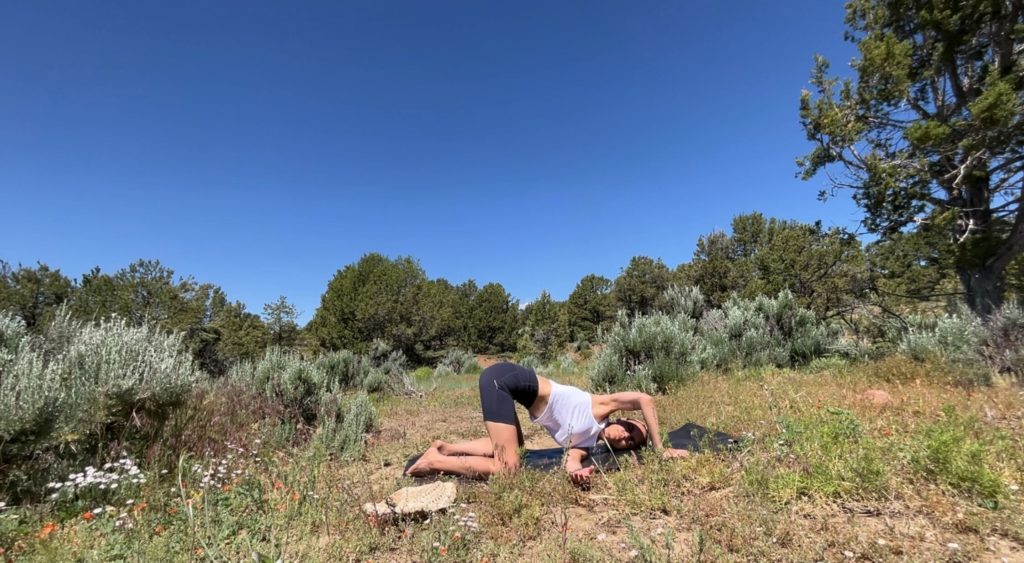
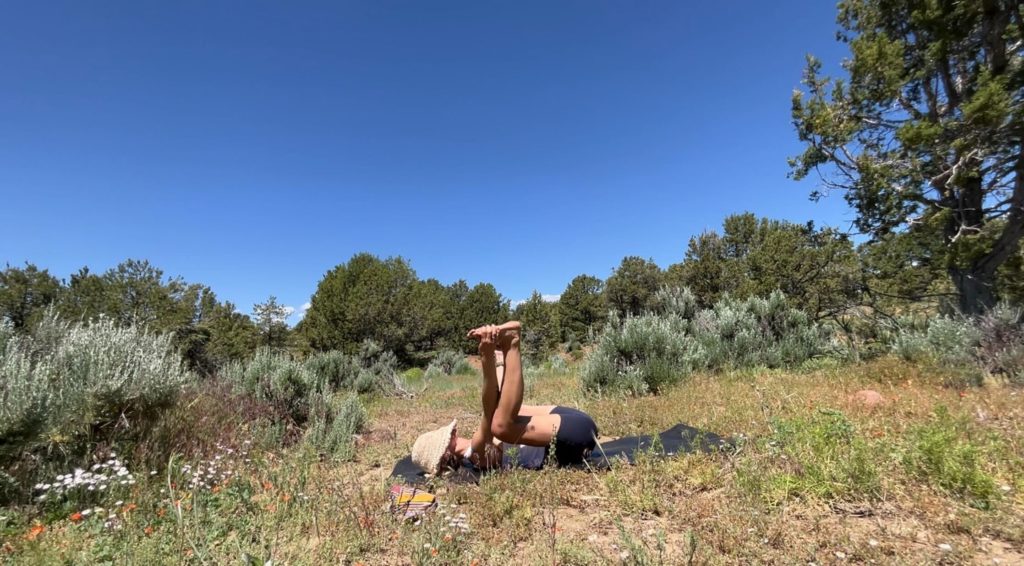
Bridge Pose – Setu Bandhasana
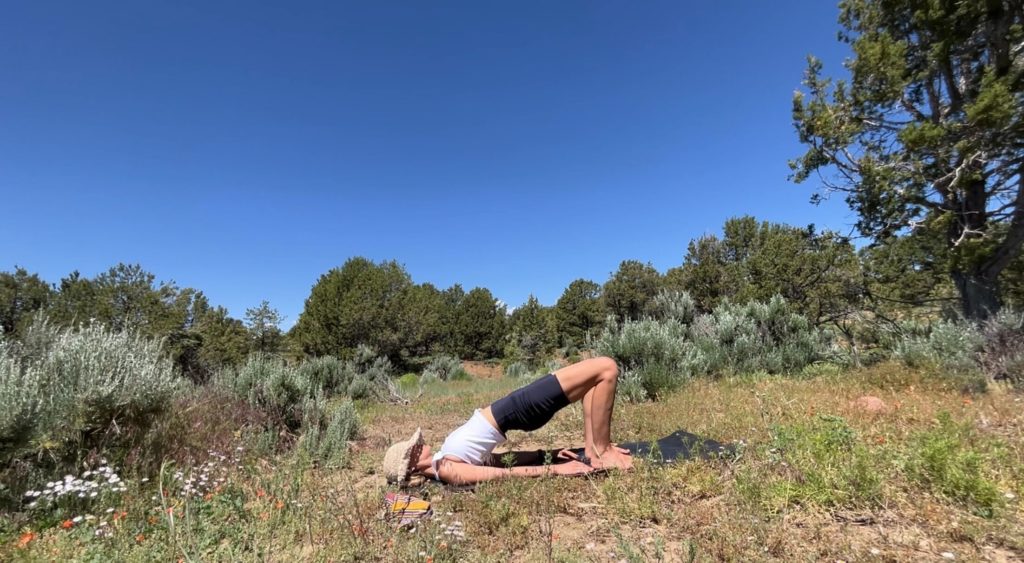
Bridge Pose is a gentle backbend that strengthens the back and stretches the chest and neck. It’s perfect for travelers as it helps to counteract the forward slump we often find ourselves in while driving or working on a laptop.
It’s another pose I love for my hip flexors. If you have flexible hip flexors then you won’t even notice it. But if not, then you’re in for a treat 🤤
Avoid this pose if you have neck or shoulder injuries. Always ensure you’re lifting with your hips and not straining your neck.
Steps to get into Bridge Pose:
- Lie on your back with your knees bent and feet flat on the floor, hip-width apart.
- Place your arms alongside your body, palms facing down.
- Press your feet into the floor and lift your hips towards the ceiling.
- If comfortable, clasp your hands underneath your body and press your arms into the floor for more lift.
- Keep your neck neutral and your gaze upwards.
Wheel Pose – Chakrasana
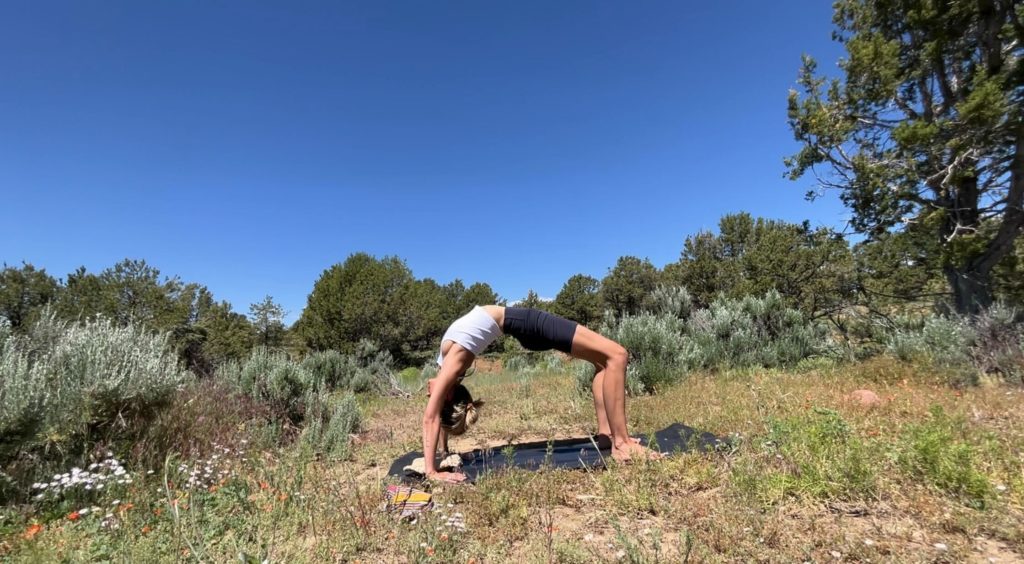
Wheel Pose is a challenging backbend that strengthens the arms, legs, and spine, and stretches the chest and lungs. I love it because it boosts energy and counteracts the effects of sitting for long periods.
If this is not in your practice, then you can do another one of your favorite backbends.
Avoid this pose if you have carpal tunnel syndrome, a shoulder injury, or heart problems. Always ensure you’re lifting with your arms and legs and not straining your neck.
Steps to get into Wheel Pose:
- Start in Bridge Pose.
- Place your hands next to your ears with fingers pointing towards your feet.
- Press into your palms and lift your head and shoulders off the floor, coming onto the crown of your head.
- Press into your palms again to straighten your arms and lift your head off the floor.
- Keep your feet parallel and knees over ankles.
Happy Baby Pose – Ananda Balasana
Happy Baby Pose is a calming pose that gently stretches the inner groins and the back spine. It’s a great pose for travelers as it helps to release lower back tension after long periods of sitting or standing.
Avoid this pose if you have knee injuries. Always ensure you’re gently pulling your knees towards your armpits and not straining your neck.
Steps to get into Happy Baby Pose:
- Lie on your back.
- Bend your knees into your belly.
- Hold onto the outsides of your feet with your hands.
- Open your knees slightly wider than your torso and bring them up towards your armpits.
- Keep your back flat on the floor.
Seated Meditation – Sukhasana
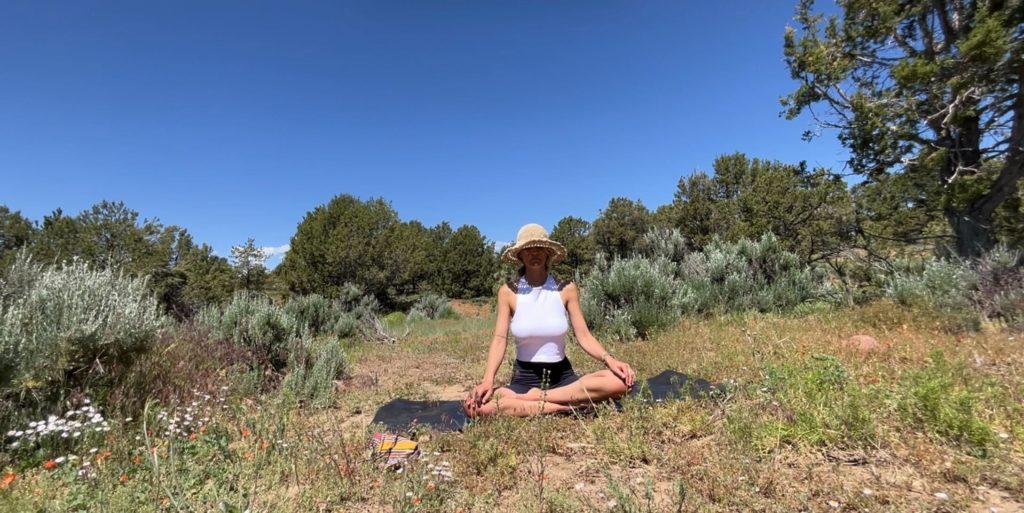
Seated position is an essential practice for calming the mind and integrating the benefits of your yoga practice. I like to take a few moments at the end of each yoga class in this seated position for a self-guided meditation.
But like all of the other postures, this is not a passive posture. Always keep your spine erect and breathe deeply. Pull your shoulder blades back and down your spine. Tuck your tailbone to facilitate an erect spine.
If it’s in your practice, this is a good time for alternate nostril breathing.
Avoid this pose if you have hip or knee injuries. Always ensure you’re sitting with a straight spine and relaxed shoulders.
Steps to get into Seated Meditation:
- Sit on your mat with your legs crossed.
- Rest your hands on your knees with palms facing up.
- Straighten your spine and relax your shoulders.
- Close your eyes and focus on your breath.
And there you have it, a yoga sequence designed for the solo traveler. Remember, practicing yoga really is not about perfection, it’s about showing up for yourself, wherever you are. Whether you’re on a never-ending road trip like me to flying off to some far away destination, safe travels and namaste!
Want to follow along with instructions? Give my yoga for travel sequence a try on YouTube:
Find More Yoga Travel Inspo
- How To Choose Self Discovery Retreats To Find Yourself
- 7 Top Rated 300 Hour Yoga Teacher Training Courses In Dreamy Locations
- Yoga For Travel: A sequence for tight hips, shoulders, and neck
- 8 Dreamy Yoga Teacher Training Courses in Thailand For Solo Nomads
- The Most Unique Hawaii Yoga Teacher Training Courses For Yogi Nomads
One Comment